The Ethfinex Listing Guide
There are three stages to listing on Ethfinex exchange. Each stage must be completed in order to do so, just submitting a token to the TCR above is not enough. NOTE: Projects MUST have valid badges before going forward to the Nectar Community Vote.
How to list a token on Ethfinex Exchange using the Kleros Token Curated Registry.
Please note: the Ethfinex token vote has paused in connection with Ethfinex's evolution into DeversiFi, please stay tuned for further updates on this: https://blog.ethfinex.com/ethfinex-token-vote-break/
Quick Guide
- Submit your token and wait for the registration to be approved (2 days)
- Add the Ethfinex Compliant Badge to your token and wait for verification (5 days)
- A subset of 12 tokens with the Ethfinex Compliant Badges will be put forward to the NEC community vote every month
- Tokens which finish in the top three spots in the community vote will be listed to Ethfinex and Bitfinex.
There are three stages to listing on Ethfinex exchange. Each stage must be completed in order to do so, just submitting a token to the TCR above is not enough.
NOTE: Projects MUST have valid badges before going forward to the Nectar Community Vote.
1 - Submit a token to the list

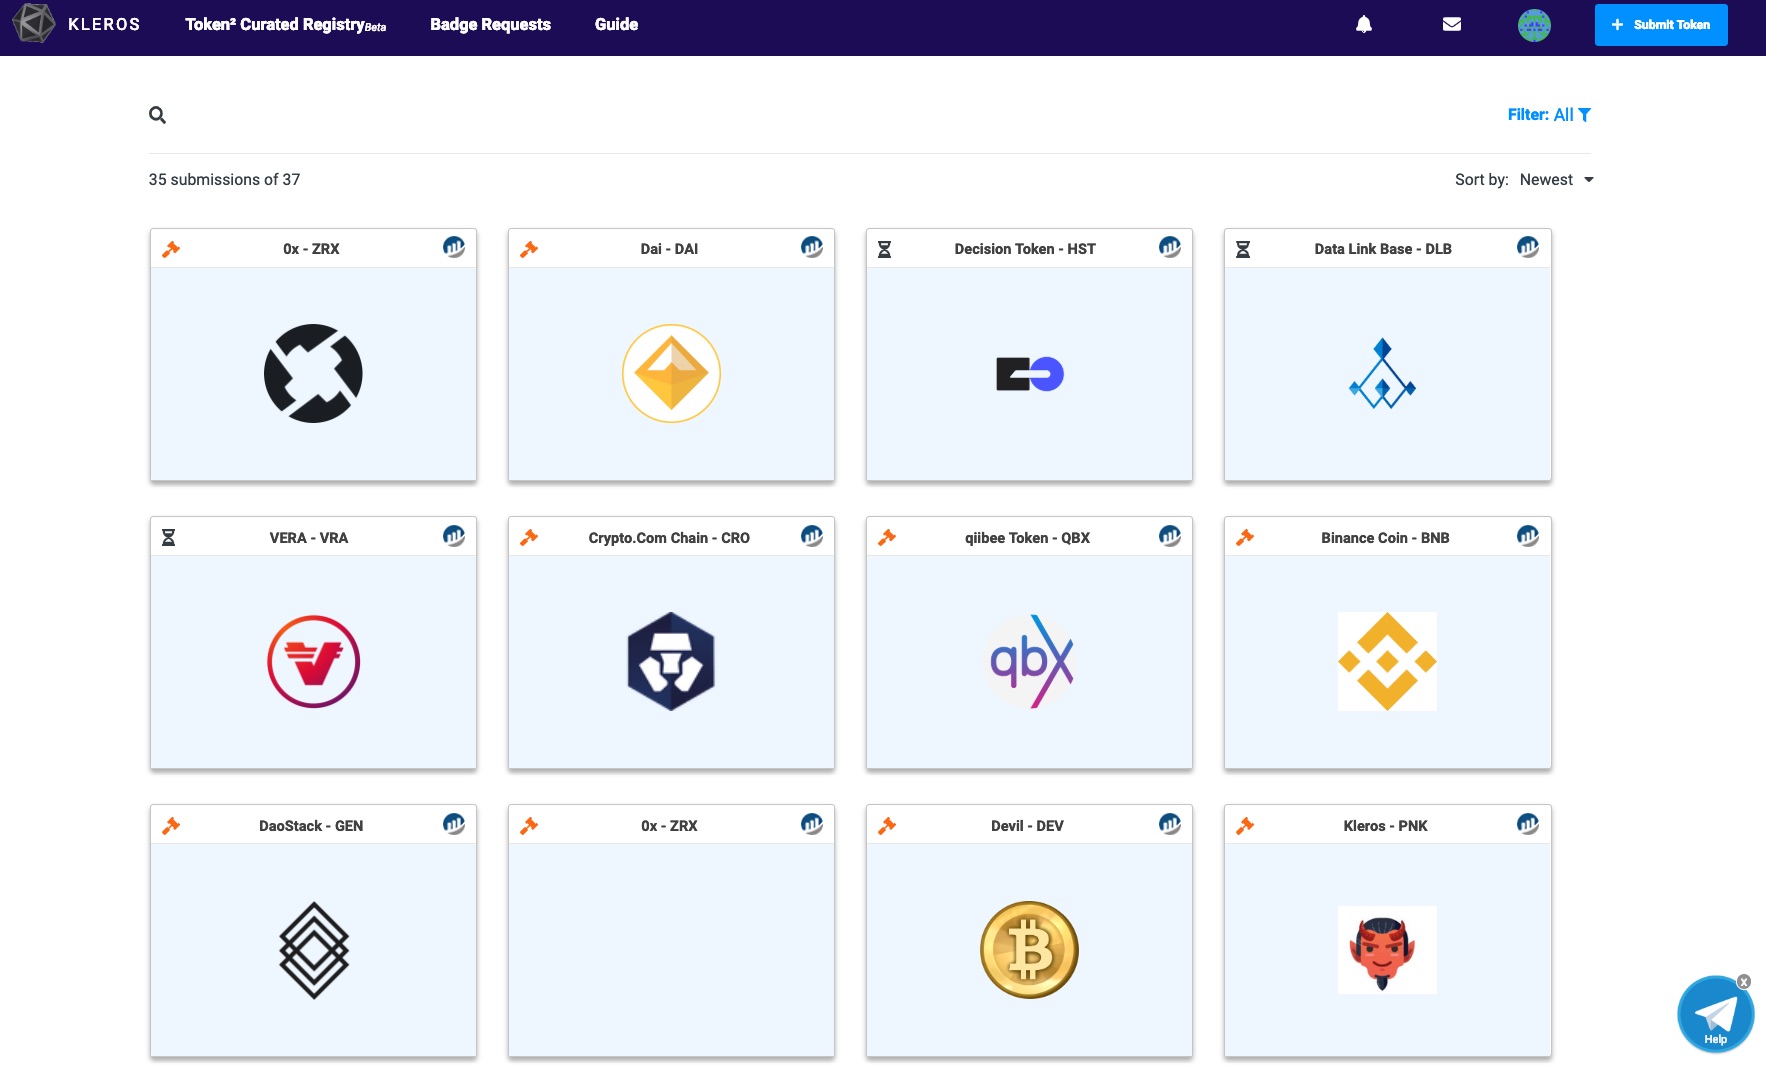
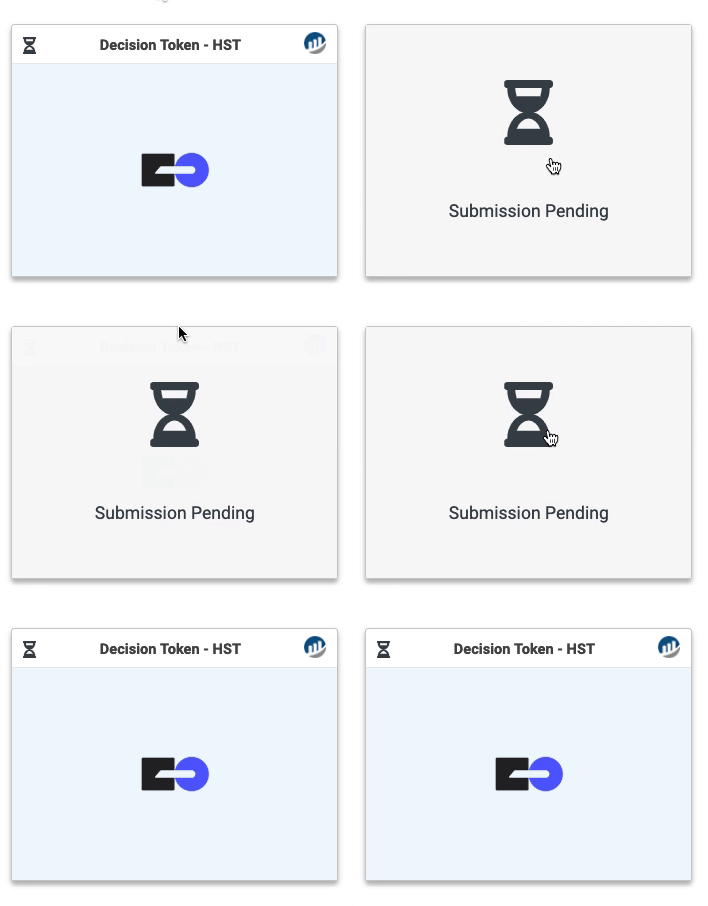
Upon submission, your listing should look something like the token below.
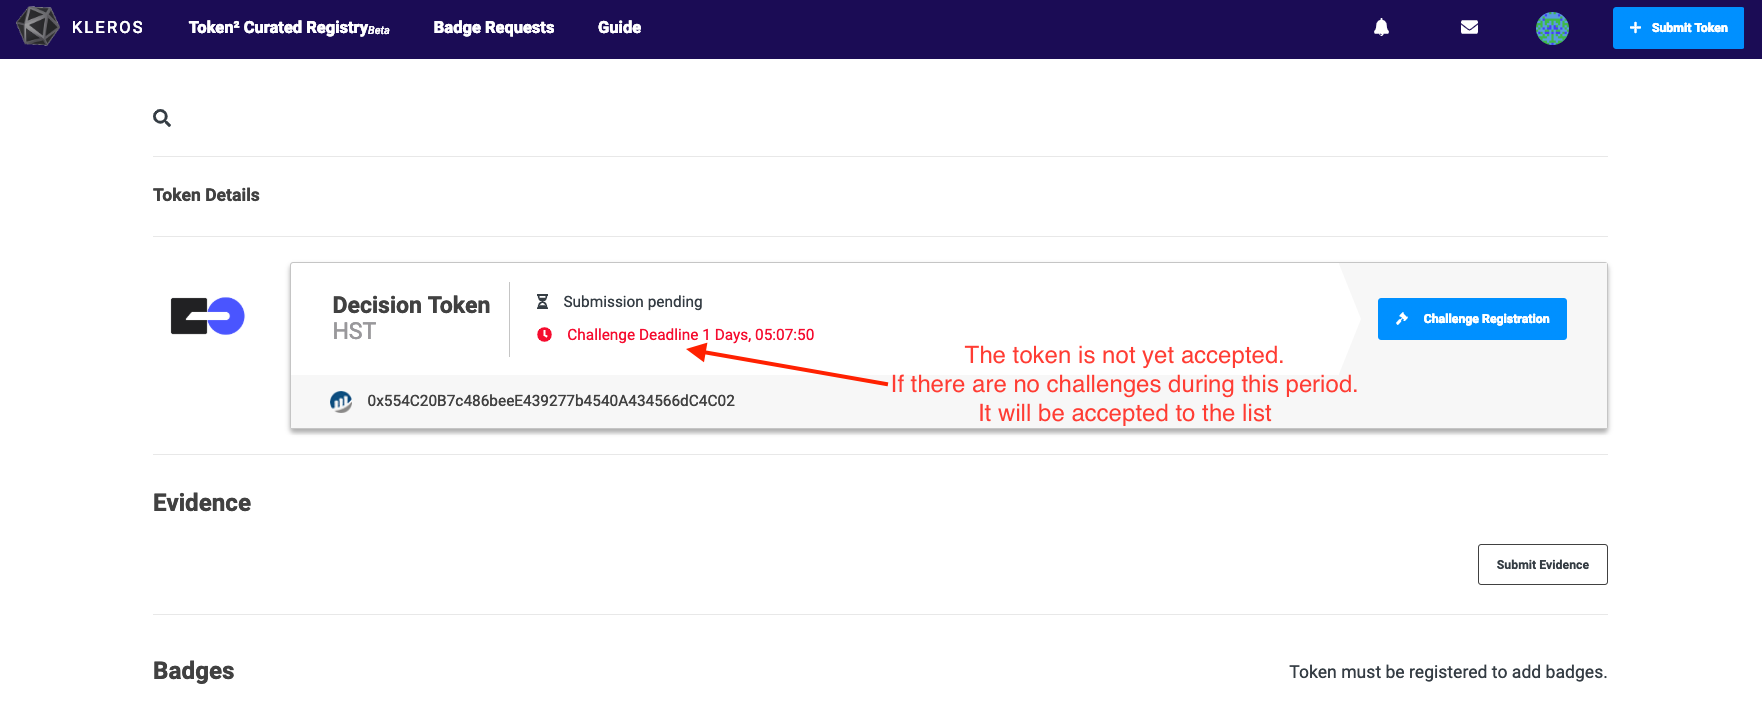
Upon clicking on your submission you will see the info displayed below including the challenge period. This is the time allotted for other users to challenge the listing in the case of incorrect data or logo format.
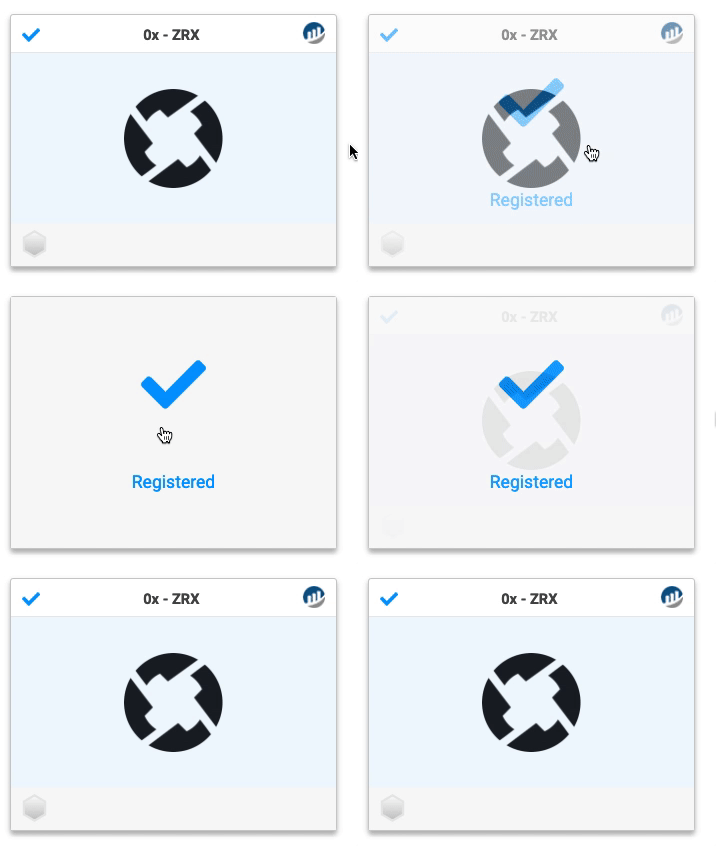
Once this challenge deadline has passed, the token status will change to 'Registered' as shown below. Remember, users can also challenge the submission which will send it to trial to be arbitrated on by Kleros jurors.
They will make the final decision based on any evidence given if the token should be listed or not.
2 - Add a badge to the token
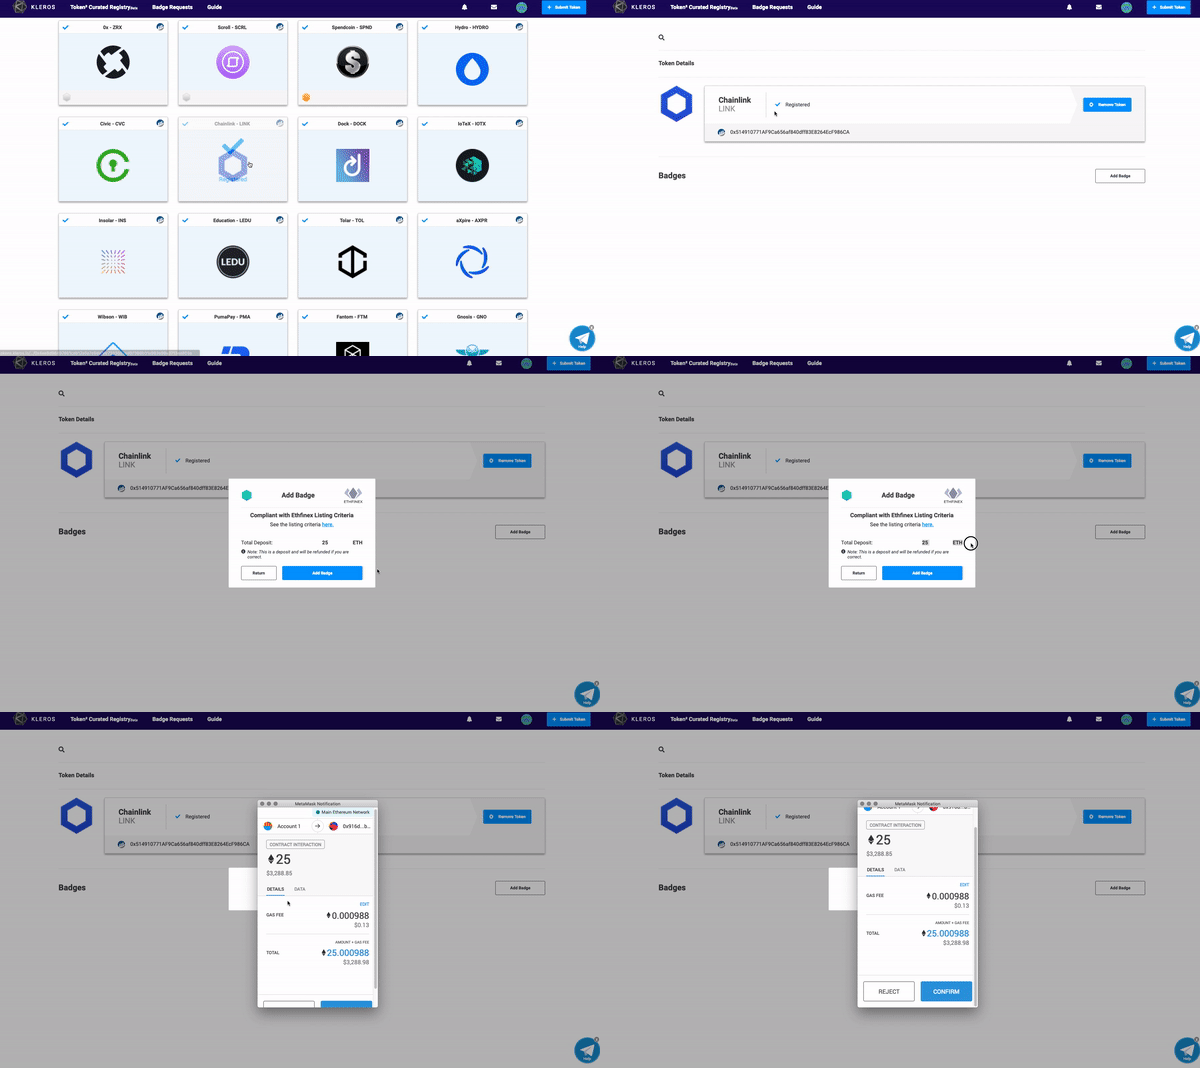
As you can see above, the token has been accepted to the list (stage one) but doesn't yet have a valid badge. To add a badge, follow the steps in the animated Gif above.
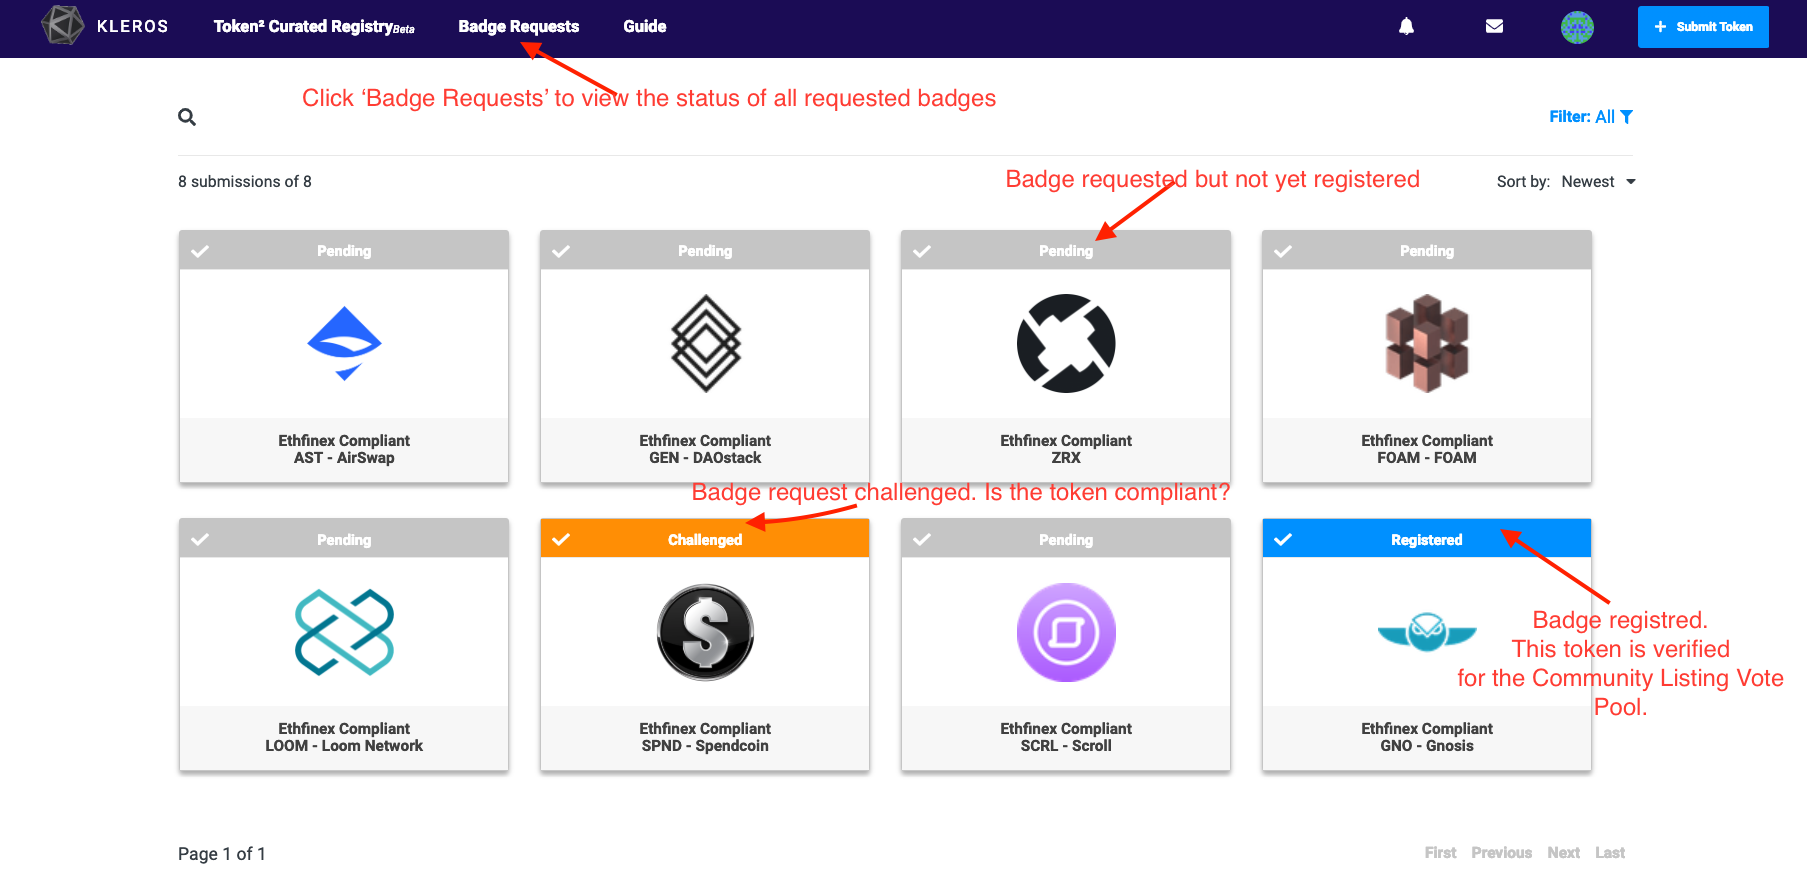
You can see the status of all badge requests by clicking 'Badge Requests' shown in the image below.
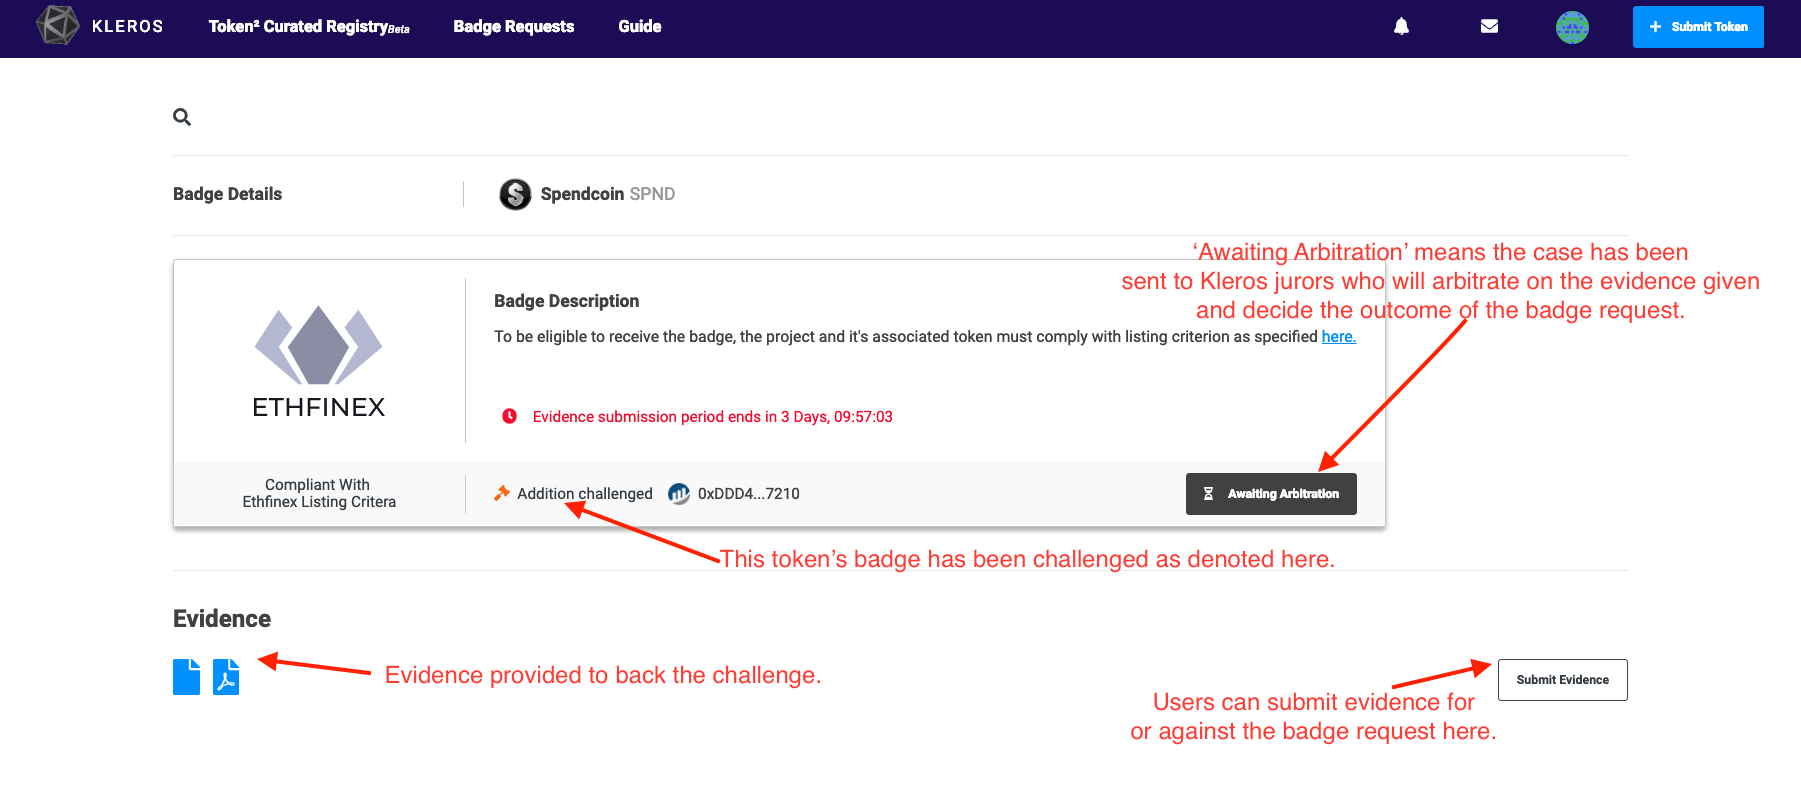
Clicking on a challenged badge will show the information below. Here, users can upload evidence which will be sent to Kleros jurors.
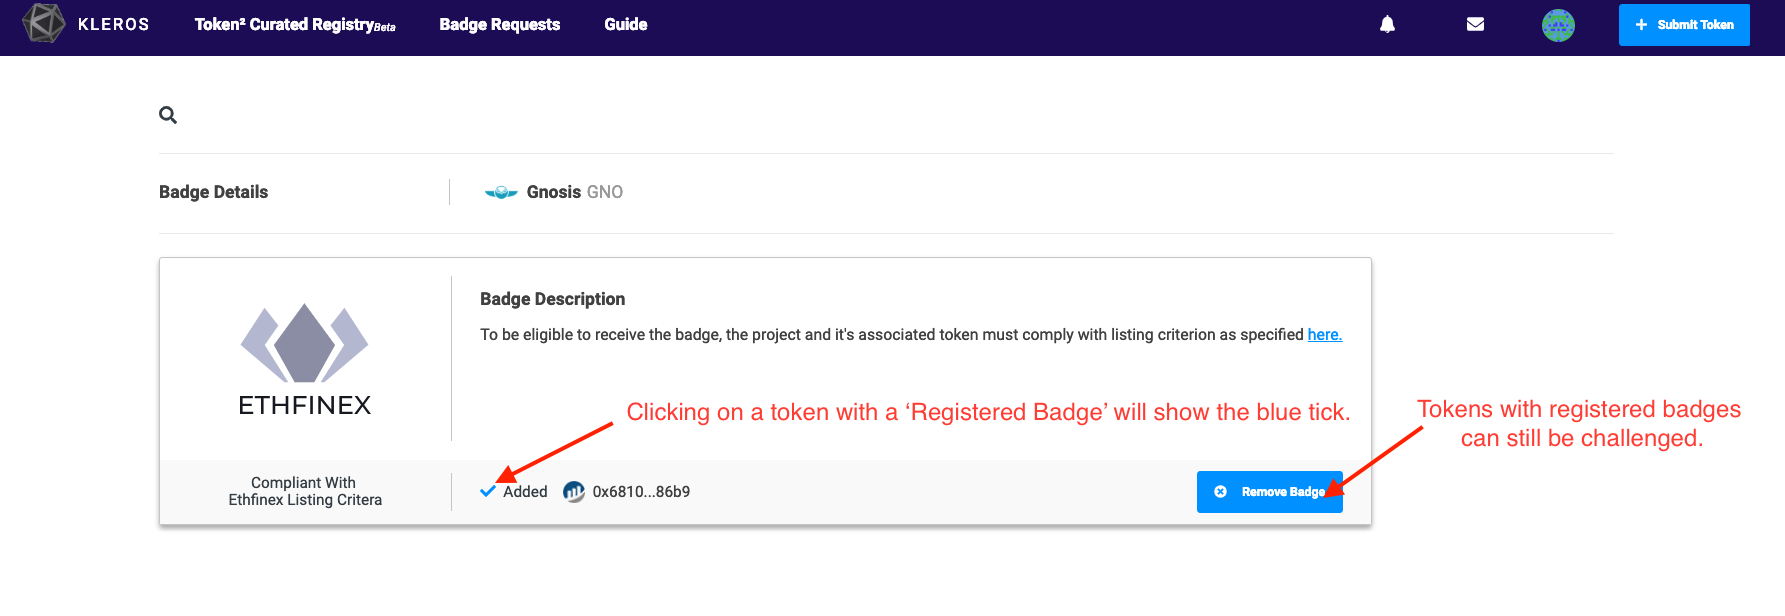
Below, we can see a 'Registered Badge' (in this case Gnosis) meaning the token is eligible for the Ethfinex Community Vote.
NOTE: This does not mean it has been listed to Ethfinex Exchange but it IS eligible for the Nectar Community Voting Pool.
3 - Take part in the community vote
This is the final part of the process. Tokens which have successfully completed Stage one: Accepted to the Token Curated List and Stage Two: They have a valid badge are now eligible to go forward to the Nectar Token holders Community voting process.
NEC token holders can choose from a pool of verified tokens which have received a badge using their NEC tokens to vote on which token they believe should be listed to the Ethfinex Exchange.
Quick Recap
- Submit your token and wait for the registration to be approved (2 days)
- Add the Ethfinex Compliant Badge to your token and wait for verification (5 days)
- A subset of 12 tokens with the Ethfinex Compliant Badges will be put forward to the NEC community vote every month
- Tokens which finish in the top three spots in the community vote will be listed to Ethfinex and Bitfinex.
And That's All Folks
For more information, see the DEEP DIVE explainer here.
You can submit tokens now by clicking here
Find out the criteria required for badge requests here.

Join Kleros!
Join the community chat on Telegram.
Visit our website.
Follow us on Twitter.
Join our Slack for developer conversations.
Contribute on Github.

